|
Why does the part eject hard or stay in the A side?
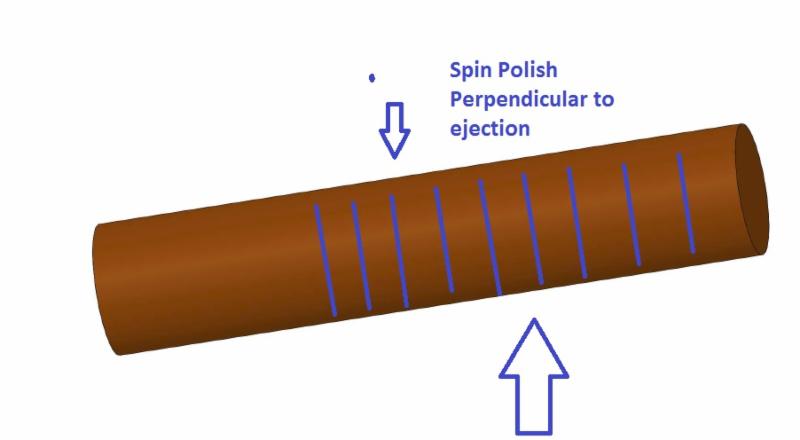
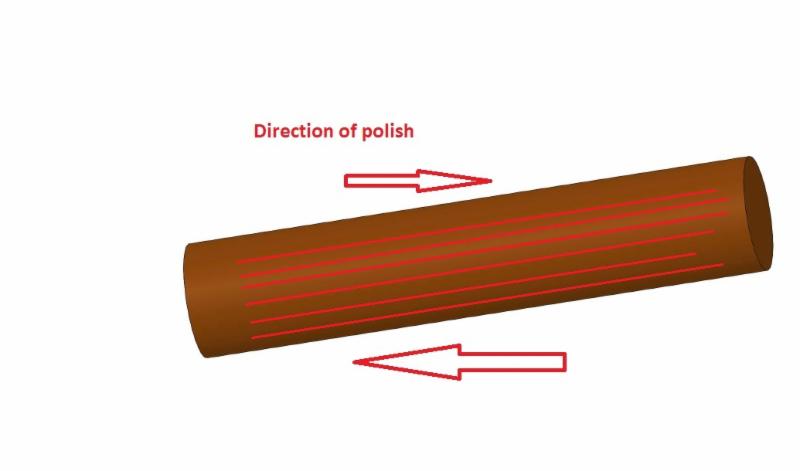
Definition: Draw Polish: to polish in the direction of ejection, thus eliminating any scratches or machines marks perpendicular to ejection.
While the above definition supports what draw polish means, the question becomes as to where to use it. One answer is long cores, and or areas of limited to no draft on cores and or cavities. The real answer is where it is needed. In some cases the core or cavity is left with minor imperfections so as to capture the part from the other side, or act as a puller.
Draw polish or polish in direction of ejection can be a costly proposition, as in polishing of long cores one can place the core into a lathe and turn and polish, fairly simple operation and one that utilizes the motion (rotational) of a machine and allows the operator to change grits to achieve a good polish on the article being polished.
Draw polish typically is all hand work, which translate to a cost, and many times is skipped and or missed in the building of a tool.
As the author was instructed too many years ago even a great polish job has minuet scratches in it which the plastic may grab. Thus in ejecting off of a core or in some cases a cavity area the plastic can hang up. Within a core the plastic shrinks against this surface and thus has additional forces to hold it captured, thus the use of draft, but as draft decreases it takes a longer stroke to disengage from the core and if polished perpendicular to the ejection may act as puller and scuff part or cause deformation upon ejection.
Do you need draw polish?
One test for this is to use a Q-tip and some mold release. The mold release is sprayed into a cap or container if in aerosol form and the Q-tip is place into this fluid and then used to wipe the resulting mold release onto the offending area within the tool/mold. (**please note if a clean room situation or mold release is not allowed spay into cap/container outside of area as when spraying particulate can escape into the air contaminating running molds within plant.) The part is shot and one looks at resulting part, did it release? If so then this area is the area which needs better release, which may mean draw polish and or just polishing it up should it not be smooth to start.
It is critical to know the surface, coatings, texture and other surface treatments which all need a bit of draft. Further coating over non draw polished surfaces still leaves the issue within the core or cavity, a very big mistake which the author has witnessed many times. It is important to remember that a rule of thumb for texture is for every 0.001" depth of texture one needs 1 degree of draft. Since texturing now is being done via a laser in many cases and the use of heated molds for high gloss may be in play sticking to this type of manufactured texture has been observed. While the author has limited experience with the issue(use of laser), it is something that one may wish to be explored when sticking occurs meaning how was texture and or pattern put into the tool steel, and what draft is there, was it chemically etched or laser etched? Also if the surface prior to coating is not draw polished those lines still exist in the coated part possibly causing capture of the plastics.
One trick which may be explored for releasing a suspected shrink issue onto cores is to raise the temperature of the core, thus decreasing the shrinkage of the plastic onto the core. It is critical to measure the temperature of the part upon ejection so as to assure it is below the heat distortion temperature of the material being used. This technique has been used many times on long cores with minimum draft to aid in ejection of parts. The down side to this is that the parts come off hotter and shall shrink unimpeded on the ID. In some cases the process was not stable enough for this by the molder and or calculated for shrinkage of this by the toolmaker and the ID may yield an undersized part.
With some materials a high polish is not desired for release. Even in these materials it is beneficial to draw polish and then abrade to correct surface finish in the direction of ejection.
Examples of polish on core pin.


Draw Polish in the direction of ejection.
SLSILVEY
06042015.02
Visit our website
|