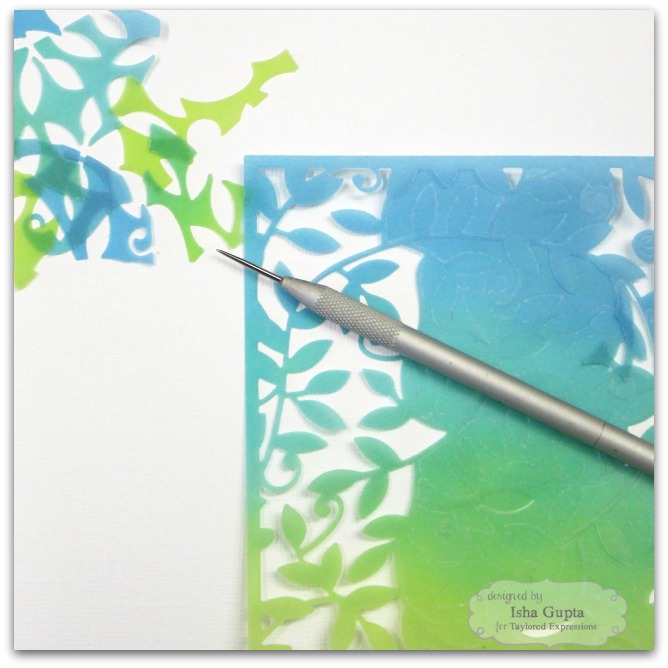
Now let's get started!

Step 1. Begin with a full sheet of vellum, sized large enough to accommodate the cutting plate. Apply distress inkpad directly to the vellum. Rub applied ink using a paper towel to spread.
 Step 2.
 Apply a second and third color of distress ink and continue to rub with paper towel to blend each color. (In Isha's card, she used Twisted Citron, Peacock Feathers, and Cracked Pistachio.)

 Step 3.
 Die-cut this vellum piece using the
Leafy Vine Cutting Plate. Remove the negative pieces. (Hint: because the vellum is delicate, you may want to use a paper piercer to make this easier.)
 Step 4.
 Die-cut a white frame using the
Frame in Frame Cutting Plate from cardstock.
 Step 5.
 Adhere 3D foam on the edges of the
inked side of the vellum piece and adhere the
Leafy Vine die-cut to back of frame. (Note: the color will have the more subtle look of dorsing as it shows through the front, un-inked side of the vellum.)
 Step 6.
 Apply adhesive to area behind frame and adhere to card base.
 Step 7.
 Stamp sentiment using StazOn black ink onto a piece of vellum and adhere to card, tucking behind the white frame to hide adhesive.
The finished card:

We hope you are inspired to try coloring vellum using Isha's faux dorsing technique! When you have made your project, visit our Facebook Page and share with us!
Bonus Projects: Visit the TE Blog HERE for two more takes from Isha using the Leafy Vine Cutting Plate!
For more of Isha's work, visit her blog, New Ideas!