 |

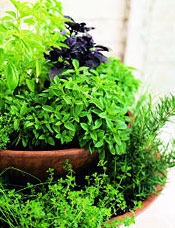
Give the Gift of Fresh Herbs
 Mother's Day is this Sunday, and if you're looking for a unique gift this year, how about a container full of her favorite fresh and fragrant
herbs?
Mother's Day is this Sunday, and if you're looking for a unique gift this year, how about a container full of her favorite fresh and fragrant
herbs?Although many herbs grow well in containers, growing in a pot is not like growing in the garden. Here are some tips to help get you started:
Choosing a Container
You will want the pot you choose to be attractive as well as functional. The two most common types of containers you'll encounter are clay and plastic, and each has its advantages and disadvantages.
Clay pots are beautiful, but they are more porous than plastic and will dry out more quickly, which means more watering. Plastic pots are inexpensive, durable and lightweight. They will also lose water much slower than their clay counterparts. If you want to have an upscale look without the added work of monitoring a clay pot's water supply, you can always slip a plastic pot inside a clay one for the best of both worlds!
Whichever container you choose, good drainage is the number one priority. Herbs do not like sitting in standing water, so holes in the bottom of your pot is a must. If you have the perfect pot and it doesn't have any holes, drill them yourself!
Planting
Before removing your herb from its container, water the soil thoroughly. Moist soil will clings to the roots, helping to hold the rootball together. To remove a plant from a pot, invert the pot and tap it gently on the bottom. If it doesn't come out, run a knife around the pot's inside edge and try again. Check the root ball after it comes out. If the plant was pot bound, score the roots lightly with a sharp knife, and loosen the roots by teasing them with your fingers.
Prepare your container by laying a cushion of moist soil mix in the bottom so that the top of the rootball is about 1" below the pot's rim. Position the plant in the middle of the container and fill in more moist soil mix around the plant's sides, pressing it in firmly so as to plug air holes.
Do an initial watering from the top, or put the pot in water and let the soil seep up the moisture. Set the pot in a spot protected from the sun and wind for about a week. The plants should be repotted when you see roots coming out of the bottom drainage holes.
 Save Big with Our Mobile App
Have you checked out the new version of our mobile app? Download it today from the App Store or Google Play and take advantage of these special offers this week:
|
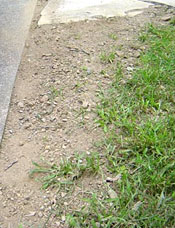
Repairing Winter Lawn Damage
 As the blanket of snow covering your yard melts each spring, it can reveal many surprises.
Toys that didn't make it inside, hoses left to fend for themselves, and invariably, winter lawn damage from snow plows. Depending on the scope of the damage, there are two common ways to tackle the problem:
Patching with Sod
Sod is a good way to patch small areas of your lawn quickly and effectively.
Use a sharp spade to cut a square shape in the lawn around the damaged spot. Holding the spade horizontally, cut the damaged sod out, taking about 3/4" of soil with it. Lay the cut-out portion on the new sod and using the cut-out as a template, make cuts around the edges into the new sod.
Rough up the soil in the damaged spot with a rake or cultivator and lay the patch in place. Press it down firmly to establish good contact with the soil and water it daily in dry weather for the first couple of weeks until the roots have grown into the native soil. Gently lift a corner to test. If you meet resistance, the sod has established.
Reseeding Dead Spots
Damaged spots can also be patched by reseeding them. Rough up the soil in the damaged area to remove dead grass and expose fresh soil. Scatter lawn seed, sprinkle on some starter fertilizer, press the seed into the soil, and keep it damp until the seeds sprout. This may take up to a month in cool weather.
|
|
|
|
 Give Mom something special to admire, grow or savor this Mother's Day! 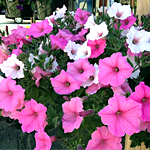 Hanging Baskets 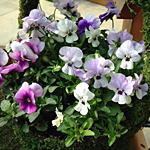 Pansies  David Austin Roses  Goodness Grows Vegetables |
 Are you Mom's favorite? You can be with an Estabrook's Gift Card this Mother's Day. Order online or visit us in Yarmouth or Kennebunk. Want to add a few new trees, but don't want to plant them? Our Planting Service can handle it for you. Visit our website, drop by one of our locations or give us a call at 207-846-4398 for more info. |
 From the ultimate garden solution to perfect gifts, you're sure to find something great in our garden emporium!  Upgrade Mom's gardening tools with pruners, trowels, shears and more in a trio of colors from Terra Verde  A pair of Bellingham Bamboo Gloves goes great with a new plant or an Estabrook's gift card for Mother's Day |