February 6, 2013
SPECIAL EDITION I
Newsletter
|
|
Hello One and All,
Lifestyle Screens Home Show schedule now features 60+ upcoming events with 10+ events completed. The Lifestyle garage screen continues to be the star of the events. Anyone doing a show, please be sure to refresh your knowledge of our recommended home show best practices found in our January 22nd and 29th Newsletters in our Newsletter Archive.
As promised, in this Special Edition I of the Newsletter, we are going to review a variety of installation tips and tricks. The effect of successful shows is sales and consequently installations, so we felt that this was an opportune time to brush up on some important installation matters.
Over the next 2+ weeks, we ask your consideration as we will be sending out 2 Newsletters per week: a Special Edition featuring detailed coverage of a single important subject matter and the regular Weekly Edition covering routine business matters.
Wishing everyone continued successes with Lifestyle Screens products.
Respectfully yours,
Brian Jones
|
|
Preliminaries
Installing the Lifestyle garage door screen is a One-Man job
SET UP:
A speedy installation begins with your set-up. We recommend that you have a set of four sawhorses and a table to work from. As many of you have seen at installation training, these items are essential.
3 BOX /3 BAG SYSTEM:A Lifestyle Screen unit comes in 3 boxes: Frame Box, Screen&Track Box, and Hardware Box.
Be sure to completely open the Frame Box and the Screen&Track Box by cutting the white strapping material to fold open the box.This will prevent the extrusions from scratching or the screen fabric from tearing. Pulling the extrusions out from one side of the box is never a good idea. Great care goes into packing our kits and we want to make sure they look as good when you open them as they did when they were put in the box here at the factory.FYI: We know that things happen from time to time. If for any reason you need to touch up a frame member keep in mind that we have touch up paint pens and aerosol spray cans available. The Hardware Box contains 3 bags: Frame Bag, Track Bag, Counterbalance Bag. Only one bag needs to be opened at any point in the installation process. First, build the frame using the hardware in the Frame Bag. When the frame is complete everything from the Frame Bag should have been used. Next you install the frame on the track. Use only the hardware from the Track Bag as you install the tracks. Finally, open the Counterbalance Bag to finish the spring and cable system.By opening one bag at a time you minimize the opportunity to lose nuts, bolts, screws and other small parts.
|

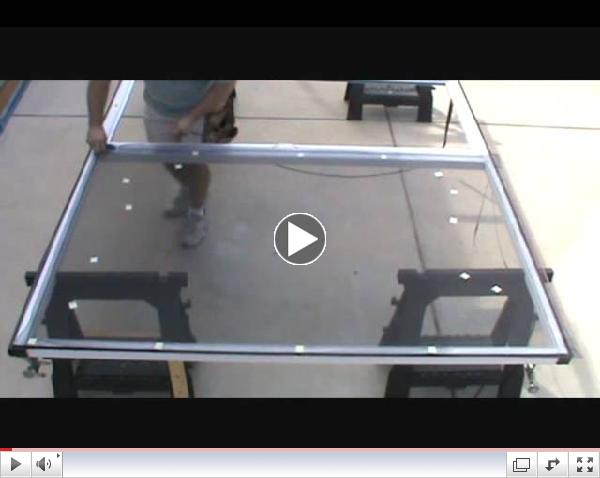
Installation Video
Elapsed time video showing installation in 68 minutes!
This is the fastest way to familiarize yourself with the installation of the Lifestyle garage door screen.
|
Screening Made Easy: Part 1
Screen Clips make it all so easy!
Most of our dealers find screening the bays of the Lifestyle screen to be the most challenging part of the installation. See how to do it in about 5 minutes per bay in this video using Lifestyle Screens patented screen clip method.
|
Screening Made Easy: Part 2 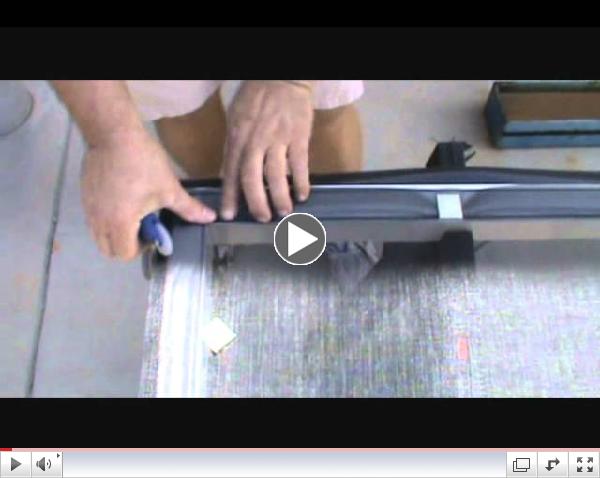
Technique for Superscreen
Superscreen tends to be less foregiving than the standard fiberglass screen so we introduce a method for splining in superscreen without causing the fabric to bunch up during the process.
|
|
Question: What is the best screen tool to use for screening?
 Answer: We prefer to use those $2.99 plastic screen rolling tools available at all the big box and local hardware stores. The roller discs should be plastic, as these are less likely to cut the fiberglass screen material if you press too hard. Remember, for our application always roll in the spline using the roller disc with the grooved edge. The other roller disc with the rounded edge is for screening window frames. Answer: We prefer to use those $2.99 plastic screen rolling tools available at all the big box and local hardware stores. The roller discs should be plastic, as these are less likely to cut the fiberglass screen material if you press too hard. Remember, for our application always roll in the spline using the roller disc with the grooved edge. The other roller disc with the rounded edge is for screening window frames.
|
PreAssembled Wheel Brackets, Pushnut Position
Right hand vs Left Hand? No need to think! 
In the Lifestyle Screens hardware box you now find the wheel brackets pre-assembled with the rollers, bushings, pushnuts, cable pins and E-clips all pre-installed. This will not only cut your installation time even further but it will eliminate the possibility that the wheel brackets are installed incorrectly. With the rollers pre-installed there is only one possible way for each wheel bracket to be affixed to the frame. Additioinally, this reduces the number of loose parts that you have to handle in the installation.
 Although all Lifestyle Screen kits are now being shipped with the rollers pre-installed on the brackets, the question has been raised as to how far they should be from the end of the shank. The push nut should be installed a maximum of 3/8" from the end of the shank as shown in the picture on the left. Although all Lifestyle Screen kits are now being shipped with the rollers pre-installed on the brackets, the question has been raised as to how far they should be from the end of the shank. The push nut should be installed a maximum of 3/8" from the end of the shank as shown in the picture on the left.
|
|
Installing and Setting the Magnetic Catches
2 fingers gets the job done. Then set it right.
How many of you have been installing the magnets on the top horizontal only to have a screw turn on you and loose the nut? If you have had this happen to you, you're not alone. Tip: Place a finger over the top of each of the two screws as you slide the magnet into place as shown in the picture.
When installing the the magnetic catches, start by lining the magnet up with the striker plate  on the header. Test the door to see how much force is needed to break the frame free from the catch. Adjustments can and should be made if you find the magnet is too strong. Simply on the header. Test the door to see how much force is needed to break the frame free from the catch. Adjustments can and should be made if you find the magnet is too strong. Simply
crack the screws holding the magnet to the frame, slide to one side or the other, and re-tighten. Test the force needed again to ensure proper adjustment. Keep in mind, in windier areas, you will want stronger holding strength on the connection.
|
|
Inserting the Bottom Seal
It's a one man job! Really.
Some dealers find installation of the bottom seal to require an extra pair of hands. Not really. Here's the trick. When installing the bottom seal, spray silicone in the T-groves in which you will be inserting the bottom seal in. We recommend that you spray a "shot" of silicone approximately every two feet in both T-groves of the bottom horizontal frame member. This will allow you to be on the end that you feed the bottom seal from and push the bottom seal across the full length of the frame. Be mindful not to overdo it with the silicone spray. A can with a directional nozzle is recommended.
|
|
Pre-Assembly Means Increased Productivity
Save time and money. Cut job-site time to 1 hour or less.
We often hear that dealers are building the Lifestyle garage screens in their warehouses and  transporting them to the job-sites. This saves a tremendous amount of time on location and allows for multiple units to be installed in record time. transporting them to the job-sites. This saves a tremendous amount of time on location and allows for multiple units to be installed in record time.By completing the frame, screening, retractable door installation and sub-assemblies in house, dealers are reporting time spent on the customers location of 45 minutes or less. The Lifestyle is easily transported on a trailer or box type truck. We even have a dealer that fashioned a ladder rack to accomodate the frame assembly!
By the way, the screen will be fine during transportation as long as it is carried flat.
|
|
Cable Routing and Spring Stretch Chart
Counterbalance System ensures easy, smooth operation
Spring stretch recommendations for Lifestyle Screens are found in the installation manual as well as in the dealers section of our website. Keep in mind, these are starting points. Adjustments should be made in small, equal increments.Typically, when the screen is pulled free from the magnetic catches and given a slight nudge, the bottom of the Lifestyle should rise on its own to between your waist and your chest. This is recommended. If it does not rise to this height on its own, you may need to increase your pre-stretch. One more thing to note, the further the Lifestyle frame travels up the vertical track on its own, the more effort it will it will require to put it into the down position. |
Tie-off Plate use and Safety Cable fixture
Lock cable in place and use balance as safety cable

After you running the safety cable through the extension spring and to the jamb, back the two  (2) lags out just enough to thread the cable behind the spring bracket. Once the cable is between the jamb and the 3" perforated spring bracket, re-tighten the two lags. Repeat this step on the opposite side. Remember, only back the lags out far enough to thread the cable behind the bracket. This should only be done with the Lifestyle in the horizontal tracks. (2) lags out just enough to thread the cable behind the spring bracket. Once the cable is between the jamb and the 3" perforated spring bracket, re-tighten the two lags. Repeat this step on the opposite side. Remember, only back the lags out far enough to thread the cable behind the bracket. This should only be done with the Lifestyle in the horizontal tracks.
|
Milano Passage Door
The Curved Face of the Milano spring cassette should face outside.
Passage Door: Always install the Milano retractable passage door on the left stud of the two center studs of the Lifestyle garage screen when looking out from inside of the garage. This ensures that the internal spring section will always be at the top of the Lifestyle screen passage bay and the curved face of the spring cassette will always be facing outside. This is the correct configuration for the Milano passage door. All other configurations will result in failure in the operation of the Milano.
|
Final Checks & Preventative Maintenance
Lifestyle Screen should move easily, freely and smoothly.
Ensure that the Lifestyle screen panel rolls easily, freely and smoothly on its rollers with minimal friction with the tracks. The screen panel should have at least 1/2" side to side play. If the Lifestyle screen panel is hard to move up and down you may need to adjust (1) the tracks to ensure that they do not bind with the rollers. If they do, slacken the lags at the jamb brackets of the Lifestyle tracks and back off the tracks enough to achieve frictionless action of the rollers and/or (2) the springs may be set too strong, adjust the pre-stretch to achieve the desired ease of motion of the screen panel up and down the tracks.
Lubrication is essential in all moving things. By teaching your customers how to lubricate their new Lifestyle Screen, you will ensure they will get many years of trouble free service.
This lubrication diagram is also available on the warranty registration page of the Lifestyle Screens website.

|
Technical Support: Do Not Hesitate To Call
We solve 99.9% of all installation problems over the phone!
Whether you are in your facilities, at a job-site, at a home show or event or just driving along and you have a technical question regarding the installation of the Lifestyle screen we recommend that you give us a call and speak to our Technical Support team. We have been able to solve or recommend a solution to the vast majority of technical difficulties that our installers encounter over the phone. If you do not call, we cannot help. So please do not hesitate to call 678-926-9700.
|
Quick Links
Easy Access to Lifestyle Screens Training Videos, Product Information & More! |
|
|
Contact:
|
Advanced Screenworks, LLC.
955 Patrick Industrial Court
Winder, Georgia 30680
678-926-9700
|
|
 |
|
|
|
|
|
|
|
|
|
