|
| | 2014 Optics Open House and Steakout at OptiPro | |
| | | |
| |
|
|
Featured Video...
 | |
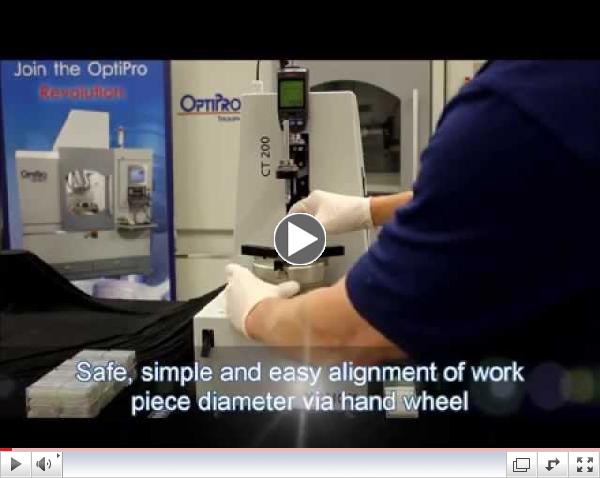
XONOX CT 200: Fast, Reliable, and Repeatable Center Thickness Measurement
|
|
|
|
|
Optical Ultra-News highlights new product information and the latest technical process developments from OptiPro's Advanced Process Development (APD) department. We will also showcase special promotions and exciting news in the world of OptiPro Systems.
|
|

|
OptiTrace 5000: The Industry Standard for Optical Surface Profilometry
|
The OptiTrace 5000 surface profilometer is becoming a staple in the precision optics industry due to the instrument's ability to perform fast and precise measurements of aspheres, cylinders, spheres, and planos.
OptiTrace 5000 is a collaboration between OptiPro Systems and ZEISS IMT - the integration of OptiTrace (OptiPro's powerful analysis software), ergonomic environmental enclosure and Y-Theta air bearing unit with the ZEISS Surfcom 5000 profilometer for generating 2D surface profiles and 3D surface error maps. Multiple advanced features help companies effectively achieve contour measurement and surface roughness analysis: - Large measuring range: up to 200 mm of X-axis travel and 32 mm vertical sag deviation
- Ergonomic environmental enclosure reduces the influence of fluctuating shop conditions
- Dual beam laser feedback and jeweled diamond stylus pivot maximize repeatability
- Multiple stylus configurations available: 2 micron or 5 micron diamond, 1 mm or 2 mm ruby ball
- Y-theta air bearing option allows for 3D surface topography generation and acylinder measurement
Precision optics manufacturers across the U.S. are choosing the OptiTrace 5000 as their solution for efficient in-process measurements or final inspection. Syntec Optics, a Rochester, NY company that specializes in diamond turning, mold manufacturing, and design for manufacturability, recently invested in the OptiTrace 5000 to further enhance their capabilities. Read the success story on how the speed and repeatability of the OptiTrace 5000 helped Syntec Optics complete a very difficult 25-piece prototype order in the required timeframe. Increase throughput and your company's bottom line with highly productive part verification by investing in the OptiTrace 5000 surface profilometer. For more information, please contact OptiPro by calling 585-265-0160 or send emails to sales@optipro.com. |
|

|
Deadline to Preregister for 2014 Optics Open House and Steakout Extended to June 30th!
| The 2014 Optics Open House and Steakout at OptiPro is less than 1 month away! For those interested in attending that have not yet signed up, we have extended the preregistration deadline to June 30th! By preregistering, not only will you be helping OptiPro make the proper accommodations but you also will double your chances of winning one of two Odyssey putters!
 | |
Tour OptiPro's 30,000 square-foot facility and see machine demonstrations in the APD lab at the 2014 Optics Open House and Steakout on July 16th
|
During the open house, you will be able to: - Explore OptiPro's latest technologies for precision optics manufacturing, including:
- Talk to top companies serving the optics industry, including:
- Network with industry colleagues while enjoying a steak dinner/happy hour!
Technical presentations and machine demonstrations will be given throughout the day to help companies increase throughput and quality of precision optics. This event is free to attend, so sign up today! Get more information >> Register Now! |
|

|
OptiPro's Ed Fess Gives Guest Lecture at University of Rochester
|
 |
University of Rochester's Optics 443 Class ( Picture courtesy of Eugene Kowaluk) Click here to enlarge image |
In April, Ed Fess, R&D/Software Manager at OptiPro, was a guest lecturer for Dr. Steve Jacobs' Optics 443 class, Optical Manufacturing and Testing at the University of Rochester. The 50 minute presentation was given to ~15 students and was titled, "OptiPro Systems Manufacturing Technology for Precision Optical Fabrication". The lecture focused on OptiPro's CNC and metrology product lines, and how they are used in the optical manufacturing process. Basic theory of the mechanisms of material removal for these technologies as well as results for spheres, aspheres, and freeform optics were also discussed.
|
|

|
OptiPro Now Offering Centering Bells
|
Centering bells manufactured by OptiPro are now available for precision optics companies looking to achieve exceptional centering results. Three major advantages of OptiPro's line of centering bells set it apart from the competition: | |
OptiPro centering bells are made from a solid piece of 100% Tungsten Carbide
|
1. Manufactured with care by experienced machinists on state-of-the-art equipment in OptiPro's machine tool showroom 2. Made from one solid piece of 100% Tungsten Carbide for added integrity, not a 2-part assembly like existing centering bells currently available 3. Centering bells are customizable for specific job requirements
OptiPro offers 12mm and 25mm shaft sizes with a 6-week delivery. For more information or to request a quote, please contact Danielle Bechtold at 585-265-0160 x245 or dbechtold@optipro.com.
|
|
OptiPro was founded on one revolutionary, yet simple, concept: optical fabricators deserve more. In the past 30 years, we have consistently built a culture that cares: a culture of employees who live and breathe by our strong OptiPro values - with first-rate customers who are collectively on a relentless pursuit of process efficiencies, design improvements, capability enhancements and marketplace superiority.
Join the OptiPro Revolution.
We won't settle. Neither should you. |
|
|
|
|