Adding Yarn to Your Stash
You just received your yarn order in the mail. Let's add it to your Ravelry stash page.
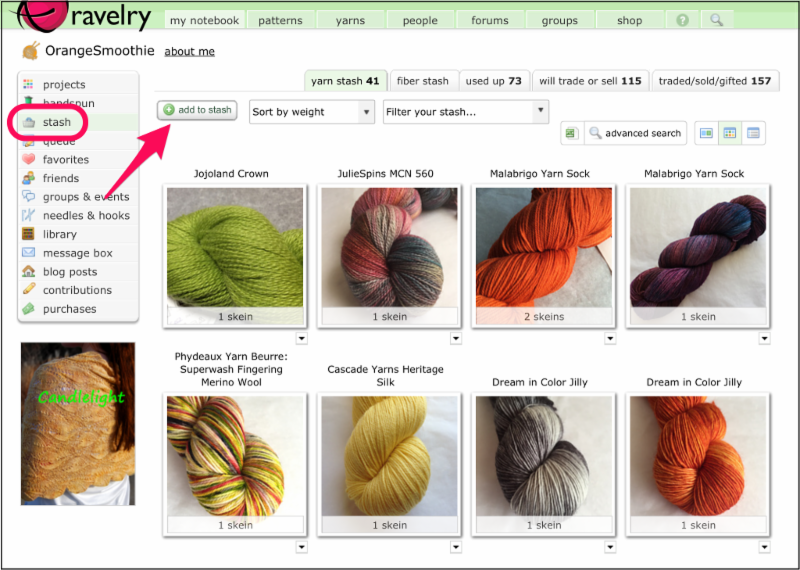
Log into your Ravelry account and select Stash in your Notebook. Then click on the add to stash button.
Just answer the questions and select the correct options that appear on the add new yarn page.
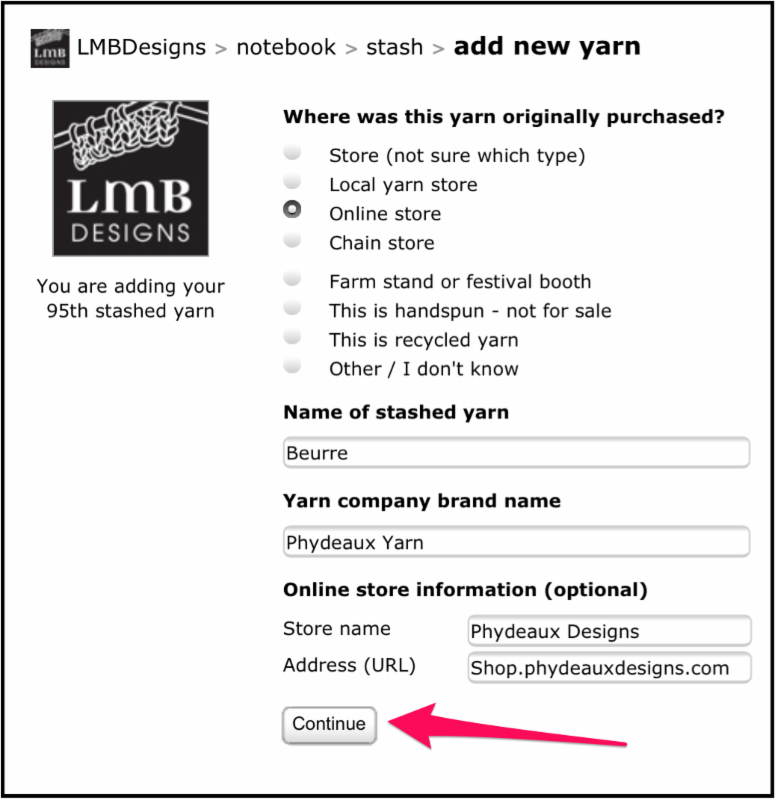
Since you purchased from an online retailer, select that by clicking on the radio button next to Online store.
Type in the name of your yarn and the yarn company brand name. As you type the yarn company name, sometimes Ravelry will show you a list to select from. If so, just click on the correct yarn company name from this list.
Although optional, you can type in the store name and website address.
Once you're done entering this information, click the Continue button.
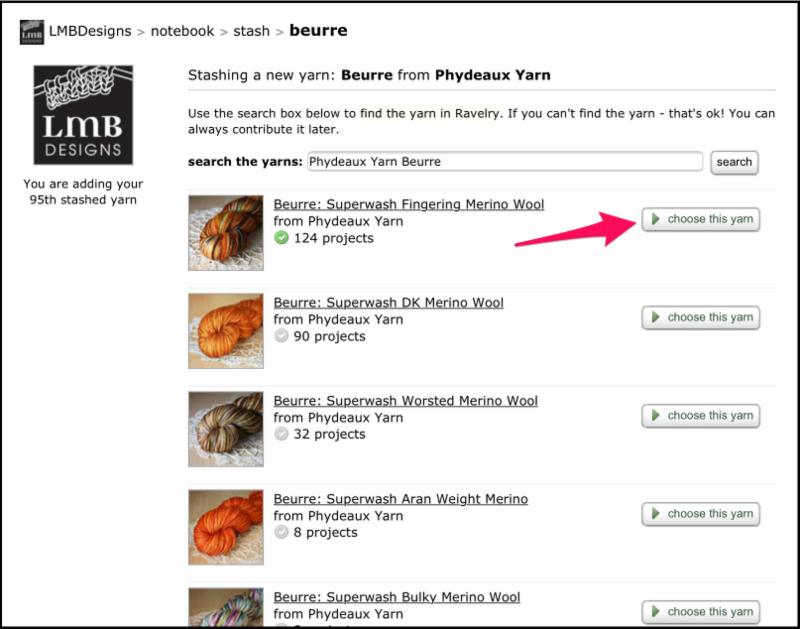
The next screen will ask you to select you yarn from the yarns in Ravelry's database. Click on Choose this yarn next to the appropriate description of the yarn you are stashing.
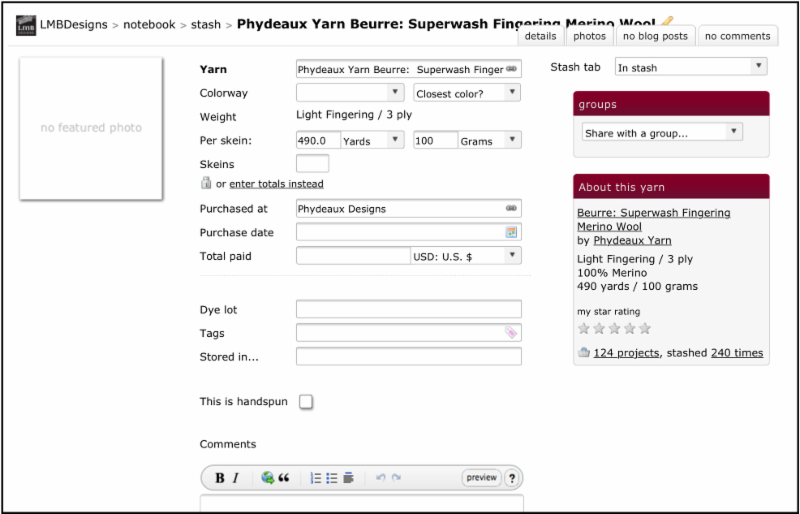
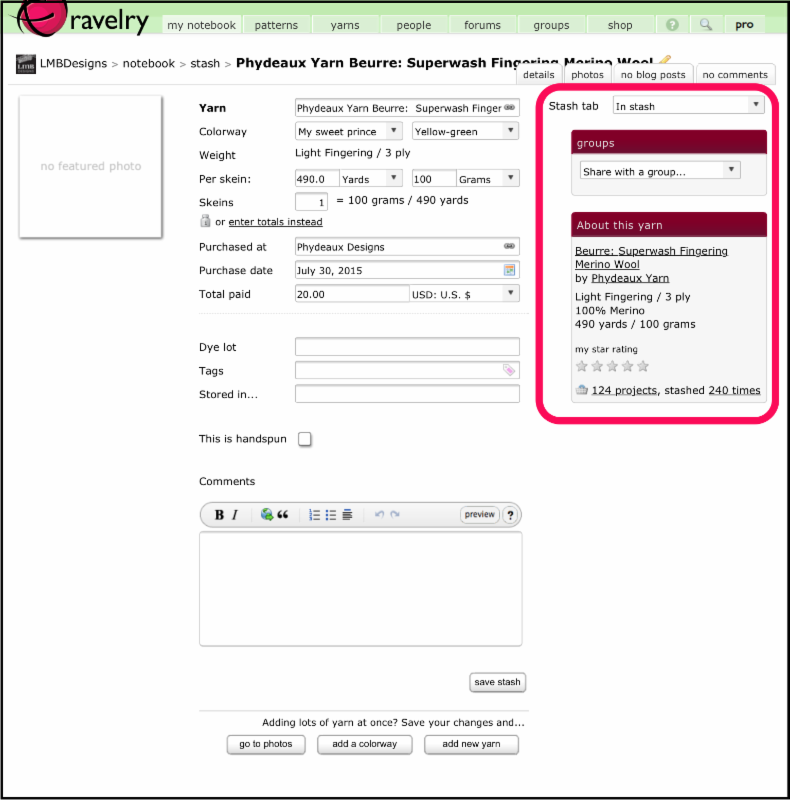
You will then see a fresh blank page where you can enter the specifics of your yarn. The more details you include, the better information you will have to use for future projects. If you don't have time or all of the information, don't worry, you can always edit this information later.
Type in the colorway, then select the closest color in the selection box. Confirm that Ravelry filled in the correct yardage and weight compared to what is shown on your yarn's label. Type in the number of skeins you have. You can add the date of your purchase, total paid, a dye lot number (if any), tags to help you find it later, and where it is going to be stored. Additionally, you can add comments about the yarn that you may find helpful to you or others.
At the top right-hand side of the yarn page, you can leave it as "in stash" because you want to keep it, or you could select if you want to put it up for trade or sale. You can change this status later, especially if you've already used it so it moves into your used up section of your stash. That keeps your current available yarn stash neat and tidy.
Other stashed colorways will display any other colors you may have of this same yarn.
If you belong to a group that you'd like to share your yarn with, you can select that group from the groups drop down list. You can select LMB Designs group to show group members your purchase!
At the very bottom of this area, you can see 124 projects for which others have used this yarn. And, you can browse other Raveler's stashes by clicking on the 240 times stashed.
Once you're done entering the information, don't forget to click on the save stash button!
Adding Photos for your Stashed Yarn
You can add photos of your yarn so you can easily see what colors you have.
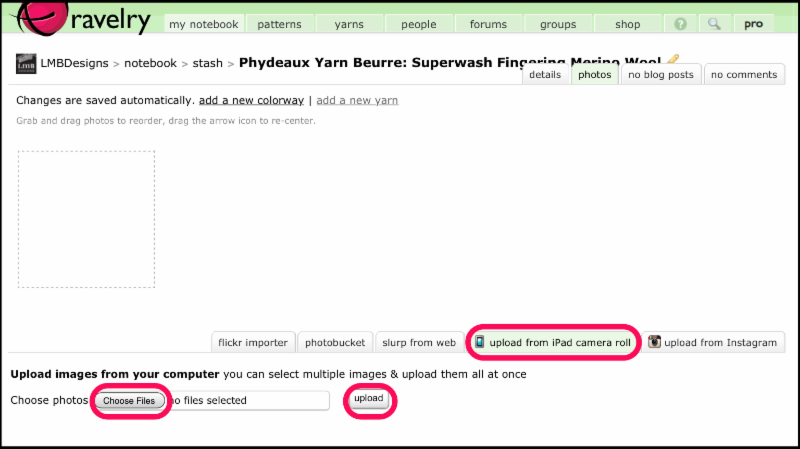
Click on the photos tab. You can add photos from Flickr, Photobucket, from a website, Instagram, or upload from your computer or mobile device (for a $5 annual fee). You can easily sign up for that option here. I recommend paying this small fee because it is very convenient for you and it helps the makers of Ravelry defray costs for this wonderful website.
After selecting the option (we'll use upload from iPad camera roll for our example), click the Choose Files button to select the photos you want to upload. Click Done, then click upload. Give it a few seconds to upload your photos.
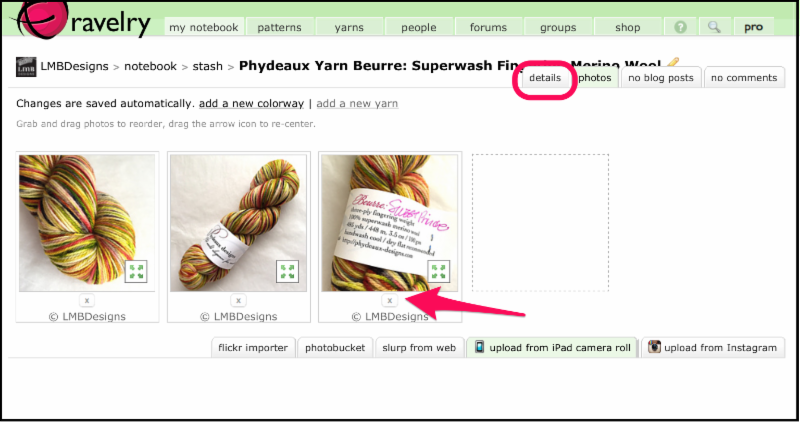
When your photos show up on the page, you can left-click and drag them to change their order or click on the tiny X to delete them if you don't want them on your page.
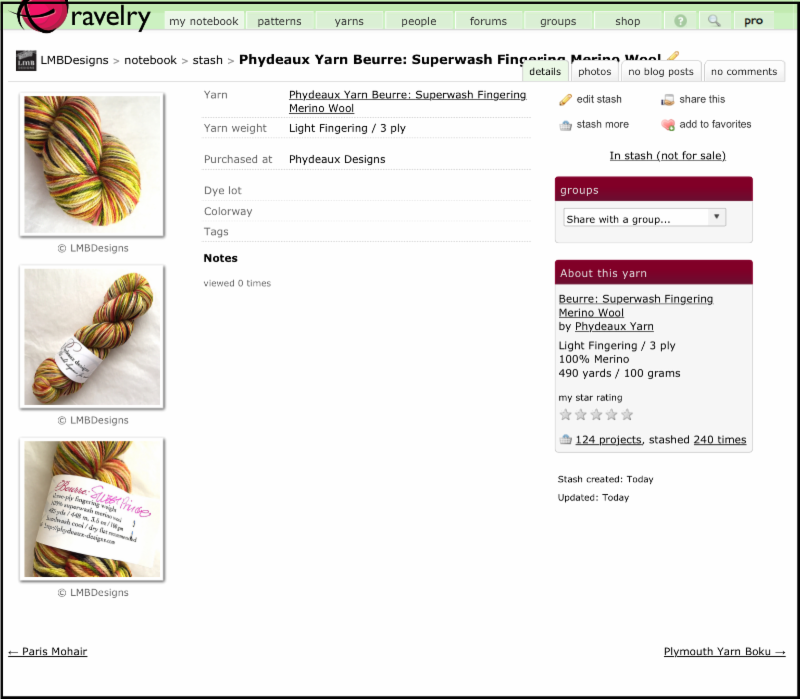
When you're done uploading photos, click on the details tab to go back to the home page of the yarn you're stashing. The photos will show up on the left hand size of your yarn page.
Additional Information on Your Yarn Page
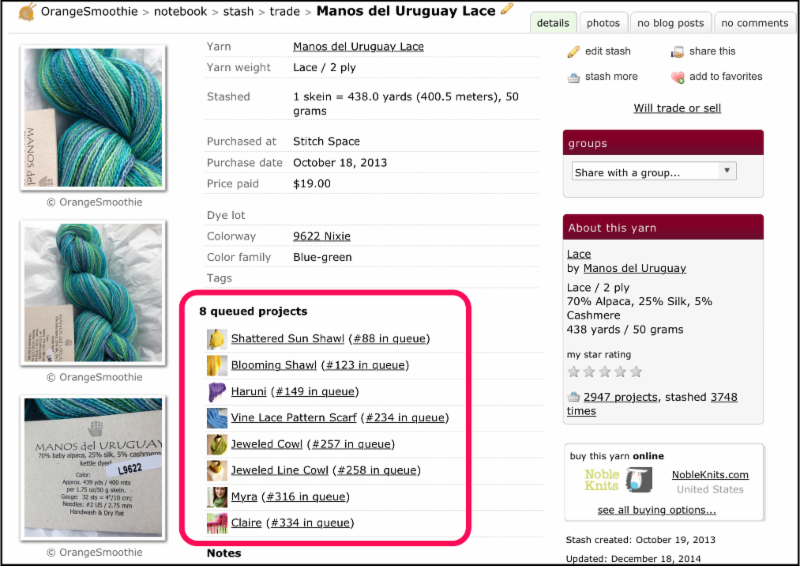
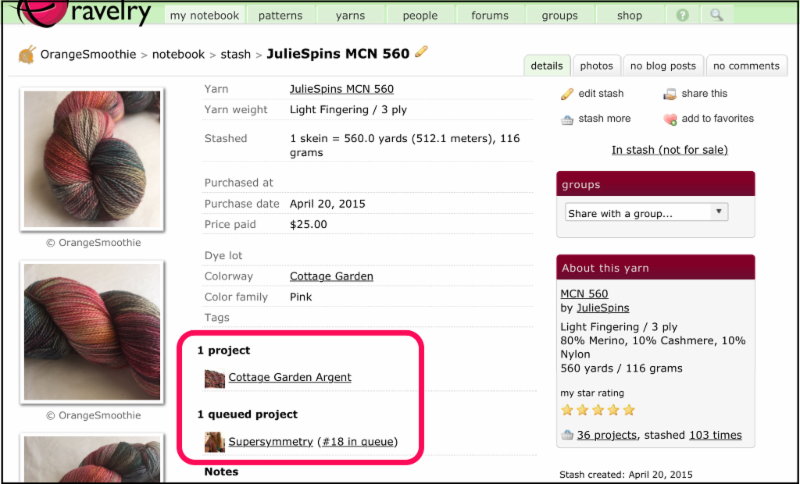
The yarn's stash page will also show what projects are queued in your notebook.
And if you link the yarn's stash page to a project, that will show up on the yarn's page as well.
Yarn Ideas for Projects
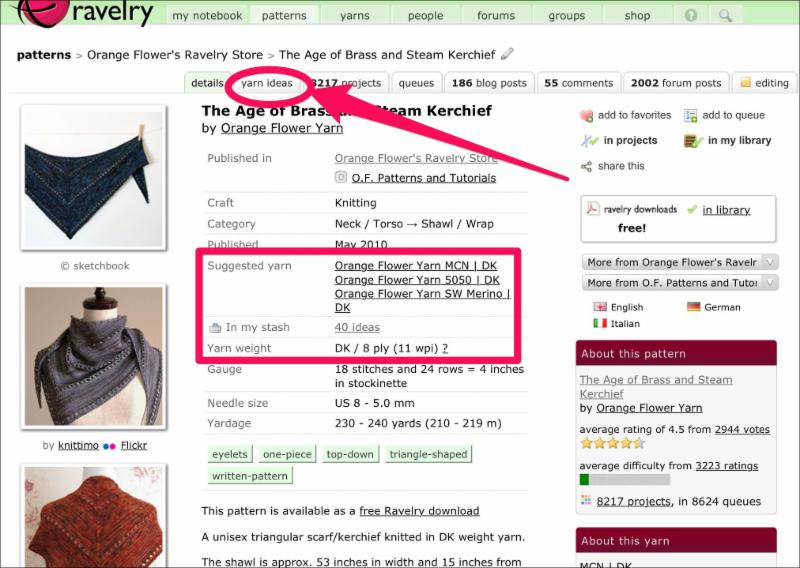
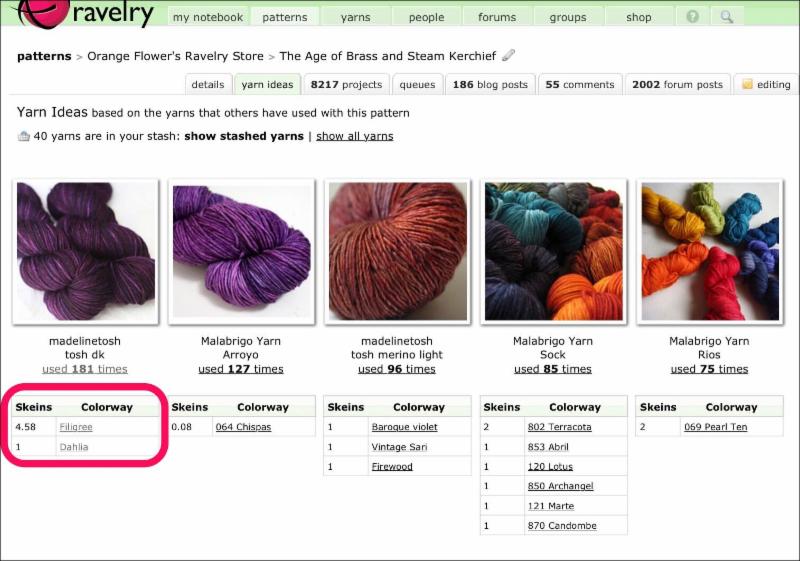
If you have added yarns to your stash in Ravelry, you can see what yarns you currently own that could be used for a project, not just the Designer's suggested yarn. Click yarn ideas.
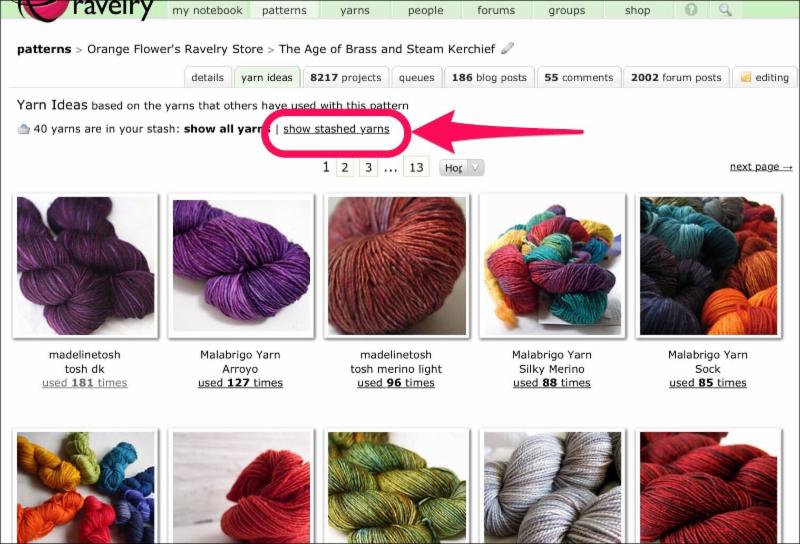
Then click show stashed yarns.
Now you will see the number of skeins of each colorway that you have in your stash that are listed in the "yarn ideas" for this pattern.
Now you know how to keep track of your yarn in Ravelry!