Get this email in your inbox every Monday morning
|
|
|
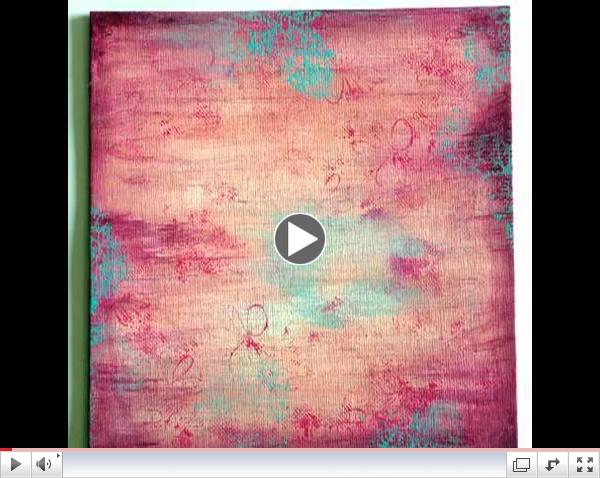
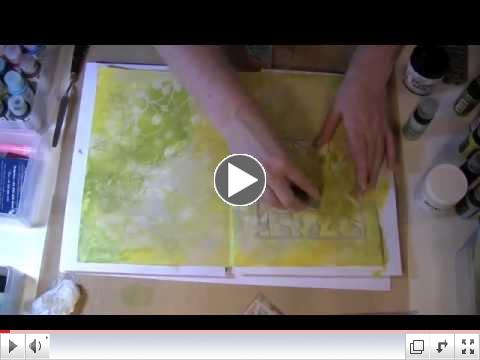
Welcome to Monday Mojo Magic - this week's email is part one of two where I show you how I created a painted and stencilled canvas. For my new artwork, I have created a 5 minute video for you showing me using the same techniques to create a journal page background.
|
|
|
|
 I have often heard people comment that they love this style, but don't know how to achieve the look. Some of you have told me that you long to be "artistically messy", but all you can manage is the messy part! Well I have taken lots of photographs and broken it down into stages and I have some tips about colour and composition along the way that I hope will help add the elusive artistic bit for you. I have so many photographs in fact, that this week's close up is actually a slide show which flips through the photos, showing you the development of this background.
This week is all about the painted background. Next week I will show you how I have finished the canvas off with stamping, paper piecing and embellishments.
|
|
My colour scheme is girly pinks, so I have chosen three shades of pink with white then some blue for contrast.
My canvas is an 8x8 inch canvas board. I've re-used a canvas that I wasn't happy with and I have covered it with a layer of gesso.
|
|
Gesso is an opaque, chalky primer, originally made with rabbit skin glue and applied warm to give a smooth ground to paint on. These days acrylic gesso is much easier to use and comes in white and black. A clear version is also available now, obviously this one is not opaque.
|
|
Apply your darkest pink (Seedless Preserves) around the edges of the canvas and rub the colour from the edge towards the centre with a damp cloth or baby wipe. If your wipe is too wet it will clean the paint off, in which case use a dryer cloth.
|
|
Add dabs of paint to the edges of the canvas and use the cloth to create streaky lines of paint. Smearing the paint in this way should ensure it dries very quickly as you are not adding water or putting the paint on thickly.
Introduce another shade of pink (Victorian Velvet) and rub around in the same way.
| |
Continue to dab and rub these two colours onto the canvas, keeping the darker colour more to the edges and leaving the centre lighter.
Once you are happy with your mix, leave to dry thoroughly. This should only take 5-10 minutes if your paint is spread out well and you have not added water to your canvas.
| |
You can now add some texture with background stamps. I am sticking with paint rather than ink, as I want the stamping to be waterproof once dry. Ink will eventually fade in sunlight, so paint is usually a better choice for a piece that will be on display.
When working with paint on stamps, have a water mister to hand and mist the stamp liberally with water immediately after you have finished to prevent paint from drying on your stamp. Mop up with kitchen towel and if needed, clean with a Magic Carpet stamp cleaner.
|
You may notice at this stage that the piece is quite streaky with my 'rubbing' all tending to be in one direction. This is actually deliberate and these streaks will be running top to bottom on the finished piece. That is because my focal point is long and thin (a Julie Nutting stamp of a very tall girl) with subtle vertical stripes on her dress. The vertical streaks or stripes are a deliberate recurring design theme in this piece, but all kept at a subtle level so as not to dominate the focal image.
|
|
If you apply paint to the whole stamp, you may find you have hard edges and corners in the middle of your canvas. I prefer to apply paint to the centre of the stamp, creating a random shape which avoids that problem.
| |
Stamp with the Picked Raspberry paint quite sparingly - this is a strong colour that can dominate - and leave to dry.
Repeat with your accent colour (Broken China), aiming for just a few areas of contrast.
| |
I chose to soften some of my stamping by rubbing the edges with my cloth. In the center, I softened the whole of the stamped portion, preferring to have just a patch of colour instead of pattern.
|
|
The beauty of mixed media is that you can try things out and if you don't like it, you can easily cover it up or add more elements to it.
Try stenciling through an old piece of lace, or sequin waste.
| |
Apply white paint to the Floral Edge stamp. With completely unmounted stamps, you can flex the rubber and just press down sections of the stamp.
| |
Understanding colour helps when working through a piece like this.
Adding white helps to keep the feel of the piece quite light and girly. That is partly because the pinks are quite light and the white is slightly transparent, keeping the whole thing harmonious.
Adding black would make it more edgy and graffitti-like because the contrast between the pinks and black would be very strong, creating a more dynamic and energetic feel.
|
|
I have already coloured the pink dress that my stamped figure is going to wear and I know that it will be lost on the background, so I need to create some contrasting colour for it to stand out against.
| |
Use your contrasting colour and a little white to create a section of the canvas for your focal image to sit on. I have used my soft cloth again to blend the colours together and soften the edges.
| |
I can now see that my pink dress will stand out nicely against this blue area.
|
TOP TIP: Always let layers dry before stamping or stenciling. That way, if you mess up, you can wipe it off without removing the previous layer as well.
|
|
Add some contrast and pattern with stencils. You can use the dabber top on Distress Paints directly onto stencils, but it can sometimes release too much paint and seep under the stencil, giving a blotchy result.
| |
If that happens, simply wipe off and start again using a separate sponge or stencil brush.
| |
I used Seedless Preserves with a sponge to add some stenciling to the corners of my canvas.
|
|
This background is at a stage where it can be used any way up. Once you decide what orientation you are going to use, you can add more fixed elements such as script or specific images.
Here is a slide show showing the progress of this canvas. Please note there was a lot of variation in the lighting conditions on the day I took these photos (from dark overcast to bright sunshine) and I have rotated the canvas as I worked too.
 | | Painted Canvas background |
|
This week I am sharing a video showing me using the same techniques on a journal page.
 Next week I will show you how this page evolved with the addition of some collage.
|
 I originally ran this series in 2013 and this time round, I am using my own tutorials to inspire me to create a new piece of artwork to share with you each week. I love to create and I am also passionate about inspiring and enabling others to create too. I hope that this email gets your mojo working and you feel motivated to get into your crafty space and have a go.  PS - if your creation features Chocolate Baroque stamps, then why not share on our Facebook Group or our wonderful private forum. In both places you will find a wonderful community of like minded Chocolate Baroque fans.
|
|
|
|
Materials used in this project are available at my online store
|
|
|