Hey there!
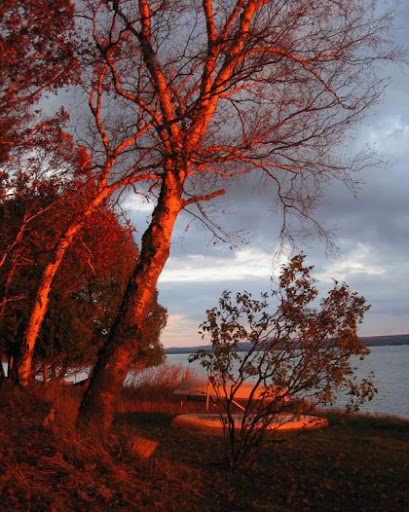
Another glorious week here in paradise... The sun's been shining, giving us some glorious days and spectacular sunsets with some interesting orange light....
|
Hot Off the Easel!
| |
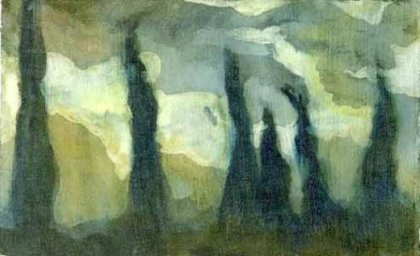
 | Frosty Walk
12 x 12
Acrylic on Acrylic Paper |
I painted this in February, so it's not exactly "hot off the easel"...but it is from this year! It was inspired by the hoar frost I saw on one of my morning walks with my neighborhood buddies (in the old 'hood... sure do miss them) Interested in this painting? Click here for more information.
Over the next week or so, I'll be adding smaller paintings to my etsy shop... Maybe there is a hard to buy for person on your gift list that would appreciate a piece of art.... Check in often! :)
|
Idea Spark-lers
| |
Do you need some painting ideas to get you going? Well, you've come to the right place!
Watercolor and acrylic medium as a resist...
Acrylic medium is a "softer" resist than traditional masking fluids.
Below is the first experiment I ever did with this method...
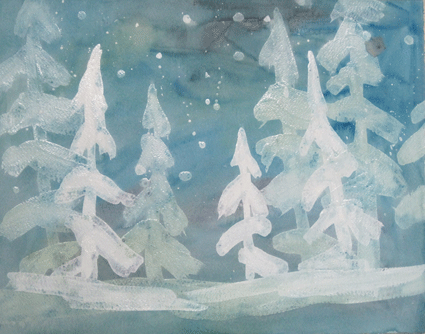
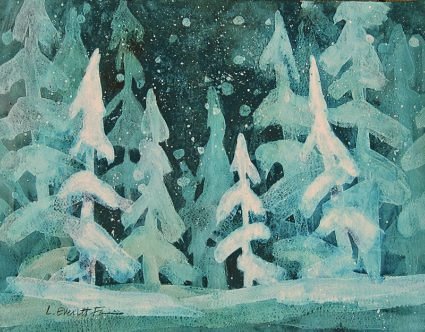
 | "Conifer Conga"
sold...thanks Candy :) |
It's almost a paper batik process... beginning with determining where your whites will be, then mid values then finally the darks.
Stuff you'll need...
**Watercolor paper- (I used Fabriano rough 140#)
**Acrylic medium- (I used matte medium in the
example above, and GAC 100 in the example below)
**Watercolor paint- any sort, but make sure you have a good dark in your palette.
Step 1. Onto pristine white paper, figure out where your whites will be and lay a good thick coat of medium over them. Then let it dry...
Step 2. Mix a good varied puddle of watercolor... pretty watery, This is your first layer of color. Coat the entire paper with it... varying the hues (colors) As you can see below, the medium resists the color.

Step 3. Let that first layer of watercolor dry completely. Now figure out where your next shapes will go. We are "reserving" the softest color now. Paint on the thick coat of medium where you want the light color reserved, and let the acrylic medium dry completely. (As you can see, there is a lot of drying time in this process. I'm working on something else during the drying time.)
Step 4. Lay down another layer of color, still varied, but slightly darker than your first wash, and let it dry completely. Now there are 2 layers of color reserved...the white paper, and the lightest wash.
Step 5. Now you know the drill...right? Paint with the medium on the next darkest shapes, and let it dry.
Step 6. Make a dark puddle of watercolor... This will be your darkest layer. Slap it on juicy and dark. You can lift some of the color off of the medium painted shapes with some paper toweling.
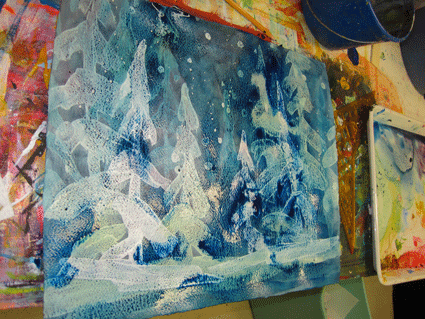

Step 7. I did a couple of layers of the darkest dark. The first pass wasn't dark enough..
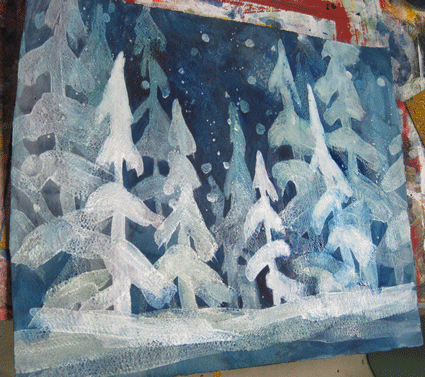
Step 8. I decided that it needed a little something..Some random splatter! I mixed some white gouache with water and splattered the sky and added a bit of the white to the trees and ground here and there. White acrylic would be fine to use too.
Below is the finished painting.... Fun!

If you decide to try this... please share your efforts with me... I won't post them anywhere without your permission... I'm just nosey! :)
|


