|
|
|
|
|
Country Papercraft's
June's Mid Monthly Newsletter
June 15, 2008 |
Hi
Welcome to the latest edition of Country Papercraft's Designer Newsletter. Out here on the farm we are busily praying for rain, with much of the rain depositing itself on the city, very little is reaching the farming communities that need it. But it always rains after a dry spell - its just the length of the dry spell that varies!
We have taken a small step backwards with the building of the shop - in the recent strong winds a couple of the panels blew down! But this has now been fixed and strengthened and waiting for the roof trusses to go on in the next few days. As soon as I have the photos on my computer I will update the BLOG with the pictures.
The Designers have all been really busy over the past fortnight - so the layouts for the newsletter are a little light on! But we still have lots of visual excitement for your eyes. With Cyber Crop winners, Surprise Designer, and a freebie book binding How-to as an added bonus.
Until next time we chat with the release of July's Designer Kit, take care, keep warm!
Stay safe 'n' happy scrapping
|
| What's New Instore?
Due to Technical Difficulties in the Shop Program, the store is unable to accept any new uploads. We are busy working on this issue and will send out a separate newflash with all the new products. We are sorry for any inconvenience - the shop is still fully functional so you are still able to place orders. |
|
June Designer Kit
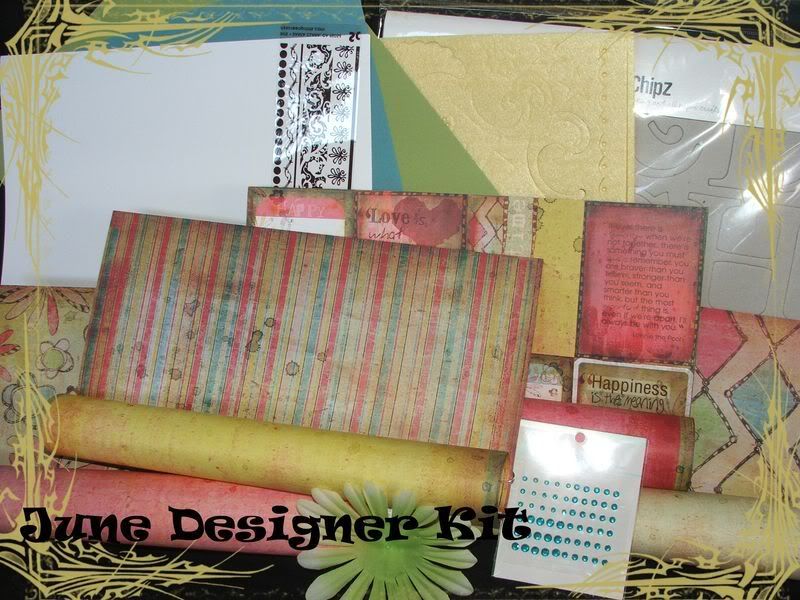
This kit was so popular it sold out with in the first week!!!!!
Each kit contains: Fancy Pants Sweet Spring Papers...Shelby, Kaydee, Lily, Sweet Spring Card Set, 12 x 12 Felt Shapes. Bazzill - Rain, White, Parakeet. Hambly Brown Transparency Strip. Heidi Swapp Kiwi Flower.
Kaiser Rhinestones. Bella Chipboard Alphas.
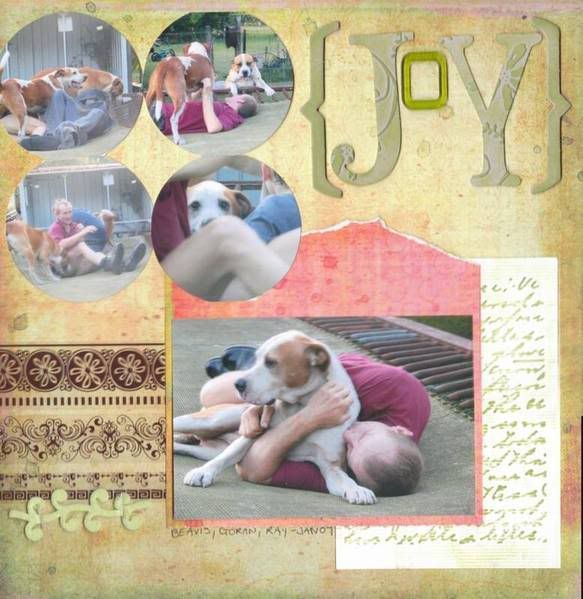
JOY - created by Julie
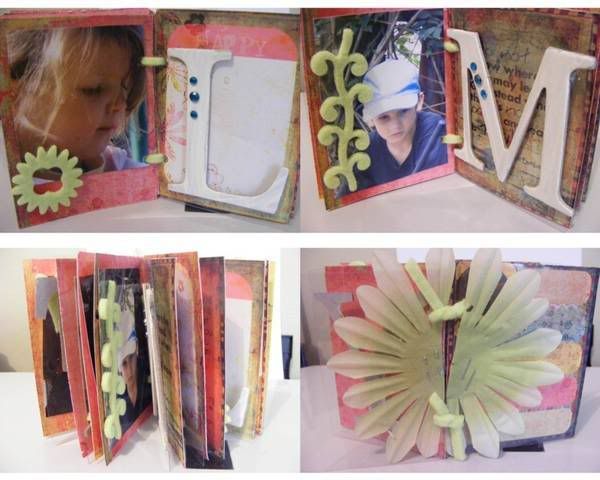
MINI ALBUM - created by Julie
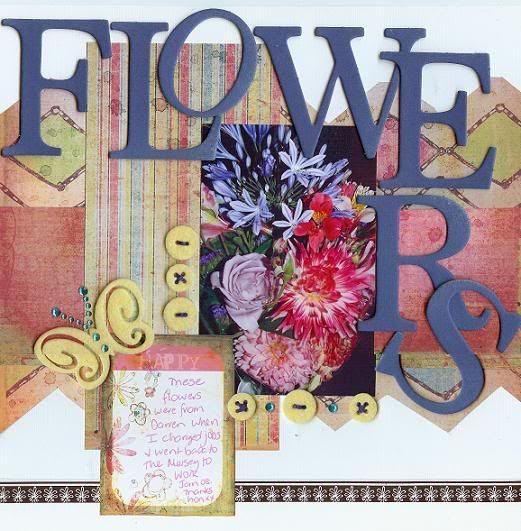
FLOWERS - created by Deb |
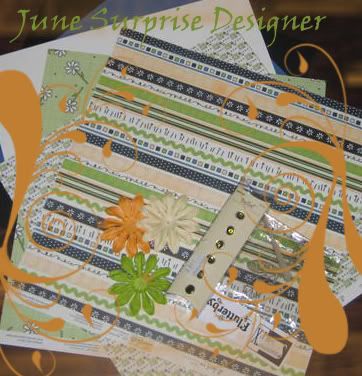
Surprise Designer Competition
Each month one lucky shopper is chosen as a Surprise Designer. It is simple to enter, all you have to do is register in the FORUM and then place an order in 2 consecutive months. There is no limit to the amount you spend each month, just place an order. Each month one lucky shopper is chosen and when they receive their order in the mail they will receive a Surprise Designer Kit. All you do then is create your layouts, cards, mini albums, what ever you wish to create with your kit. Unlike the Designer kits you may add whatever elements you wish with the kit to create your layouts.
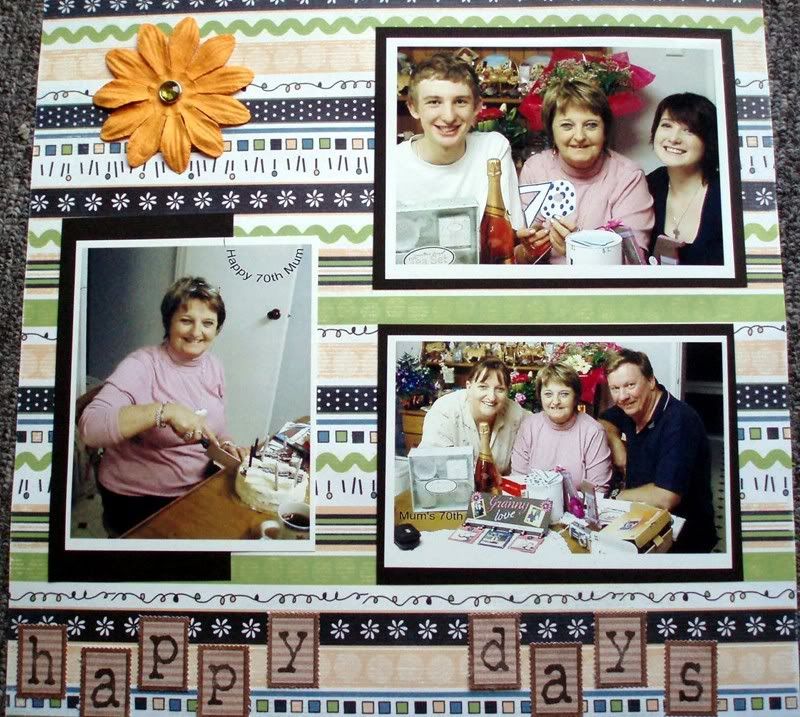
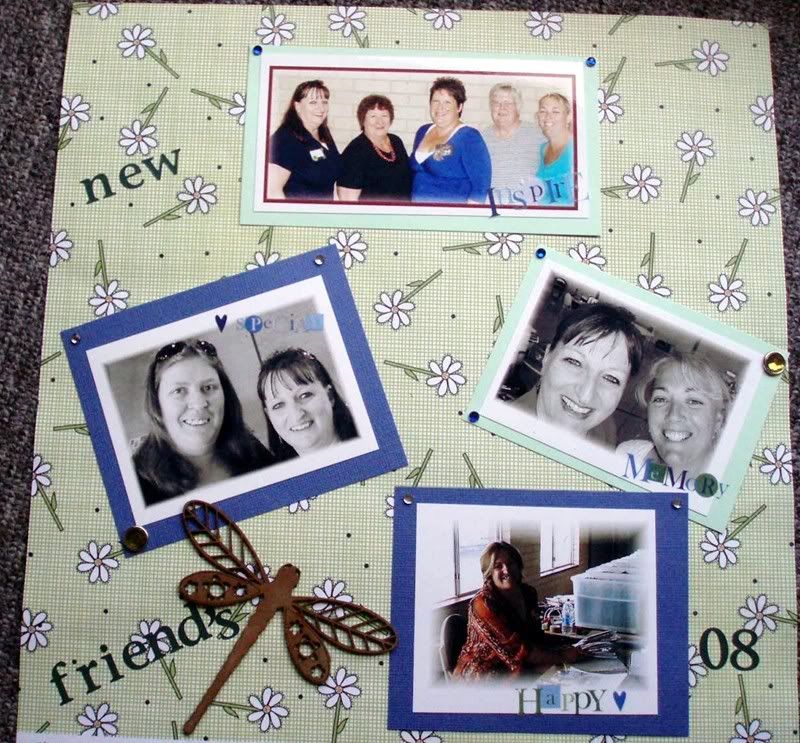
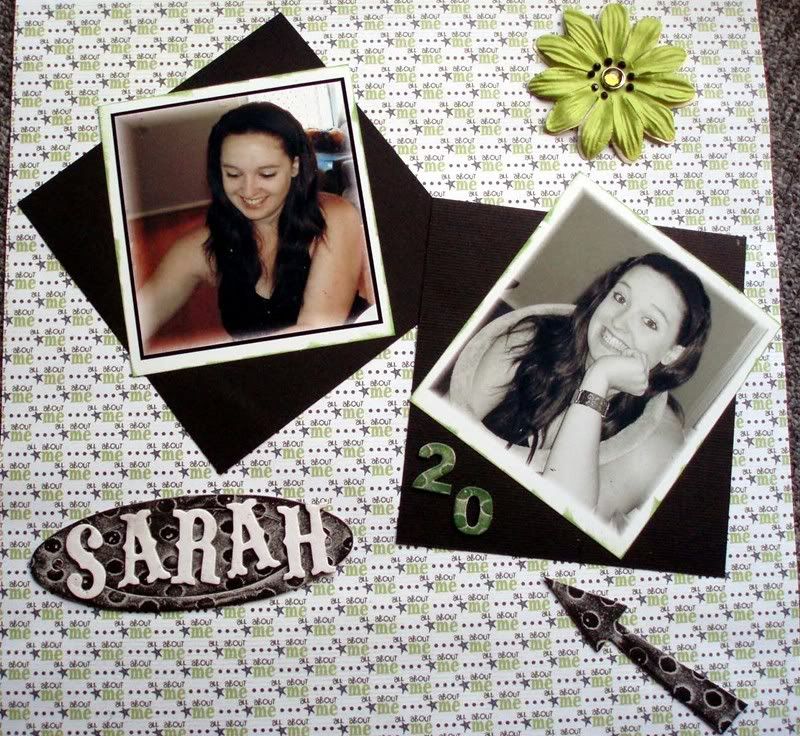
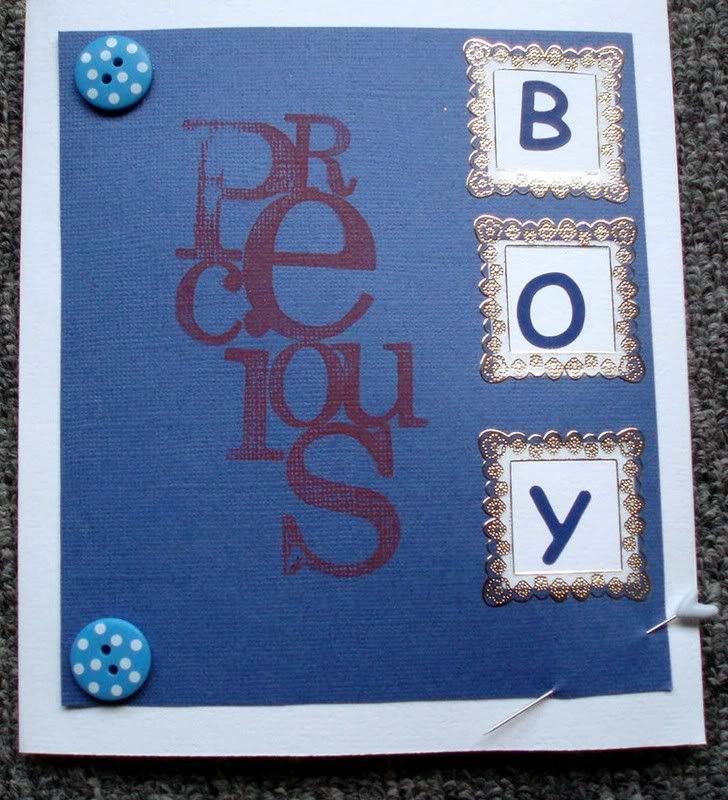
This month's lucky Surprise Designer is Parky!
HAPPY DAYS
NEW FRIENDS
SARAH IS 20
PRECIOUS BOY CARD
Great use of the kit Parky, and congratulations on being June's Surprise Designer |
| Challenge the Designers |
|
|
This month Susan challenged the Designers to create layouts with storage ideas for memorabilia. There are many times when you have extra bits to add to your pages, tickets, catalogues, brochures, clothing tags etc. By creating pockets in your layouts you are able to store these precious keepsakes with the photos.
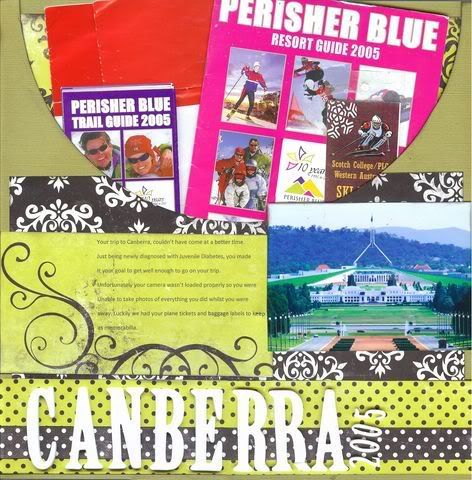
CANBERRA 2005 - created by Michelle
Michelle's son went to Canberra on a school trip in 2005, unfortunately the camera film wasn't loaded properly so they do not have any photos of the occasion. Luckily her son thought to grab some brochures and guides as keepsakes. Michelle created a pocket by cutting out a big semi circle in one sheet of cardstock and attached it to a full sheet of cardstock, therefore creating a big pocket to store the memorabilia in.
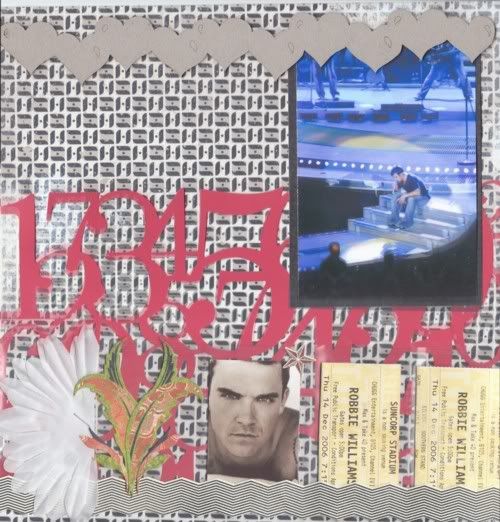
ROBBIE - created by Julie
Julie was lucky enough to see Robbie Williams in concert in 2006 - (jealousy is a curse). Julie has used plastic pockets on her layout to store her tickets in. In this way they are visible and become part of the layout.
We are still looking for more challenges - why not email us some to make us squirm!
|
|
Challenge the Designers
What would you like to see in the Newsletters? The Designers are always challenging you to create layouts for competitions and challenges, so now is your turn for payback. The Designers will choose which challenge they would like to do and create layouts for the Newsletter. So make sure you challenge them HERE, and keep your eye on the Newsletter to see the Designers squirm with your challenges.
|
| Links To Country Papercraft |
| Store
|
|
Use double sided tape to "peel" a misplaced or skewed rub on from your photo or paper. Simply place the double-sided tape over the rub-on, rub gently and then peel off the tape.
|
|
WA FOUNDATION DAY LONG WEEKEND CYBER CROP WINNERS
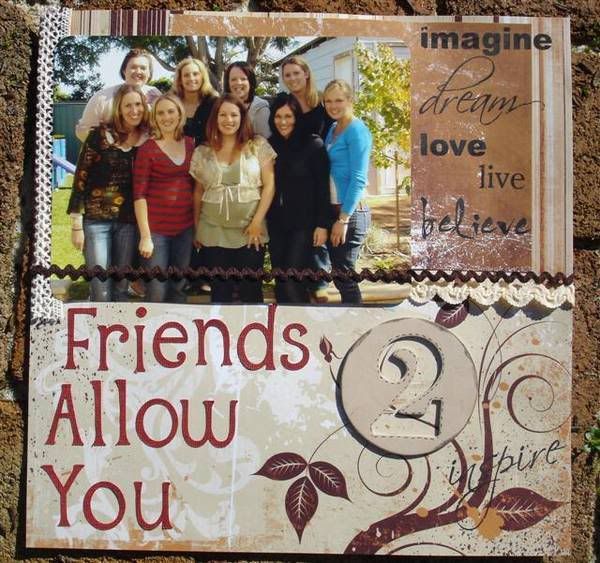
FRIENDS ALLOW YOU 2 - KrisJulie's challenge was to create a layout using lace, diecuts/stickers, 1 photo and Rub-on Words.
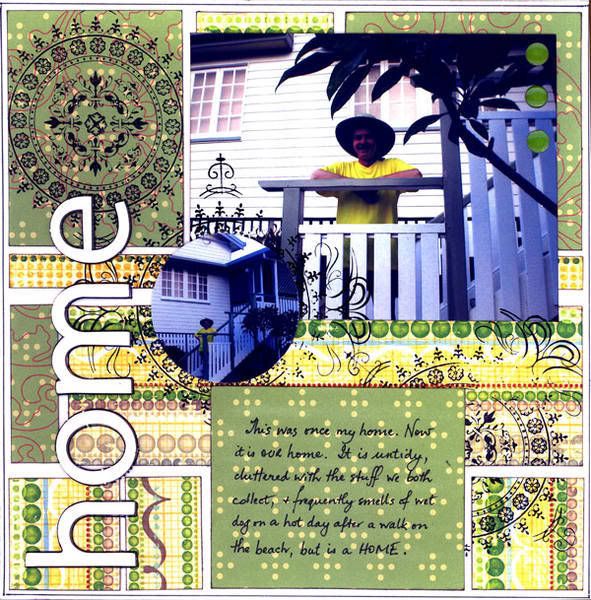
HOME - Bramblebabe
Lynlee's challenge was to scrap your home. In honour of Lynlee packing up and moving down the South of WA. She wanted us to include 3 circles, 2 patterned papers, stamping and some hand journalling.
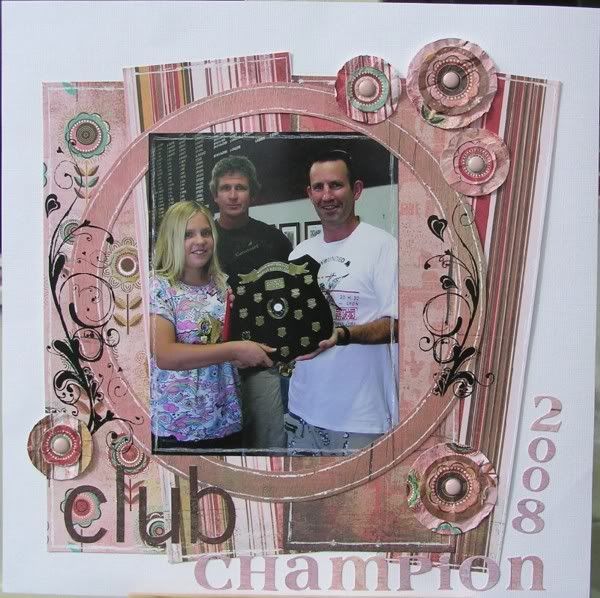
CLUB CHAMPION - QueenGeek
Michelle set a sketch challenge. There were so many different takes on the sketch.
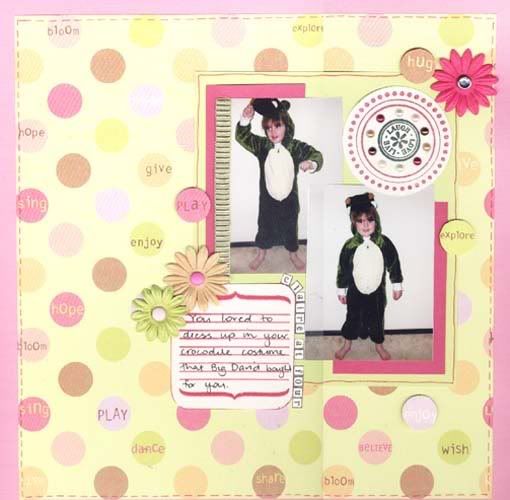
CROC GIRL - Anna
A Blind Scrapping challenge was posted. Blind Scrapping is where you are given the list of instructions and you place the items as you interpret the instructions.
YOU ARE - Scrapping Queen
Deb's challenge involved using 3 pattened papers, ribbon/lace and ink.
Congratulations to all the winners. You will all recieve a prize package when you place your next order.
The winners of the fun and games were:
BINGO - Tash
|
|
Designer Theme Layouts
The Designers decided that this month we would scrap layouts with a WHITE background. The photos also had to be of NON HUMAN SUBJECTS.
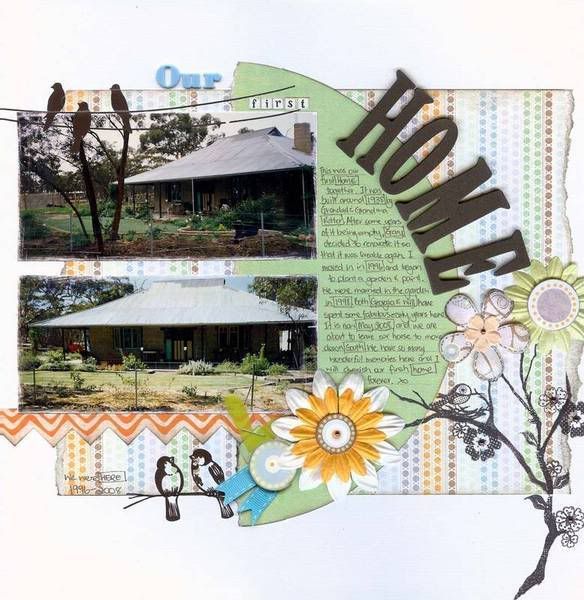
OUR FIRST HOME - created by Lynlee
Packing up her home, Lynlee discovered these photos of her home. She has used Crate Paper's Sweet Branch Papers, and Basic Greys Grow-a-Garden Clear Stamp.
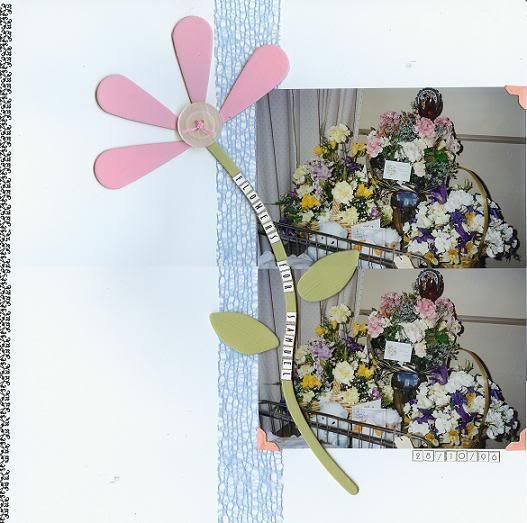
FLOWERS FOR SAMUEL - created by Deb
Deb discovered more older photos whilst unpacking. See how she cleverly used the Carolee's Tiny Etched Alpha Stickers to place the title up the stem of the chipboard flower.
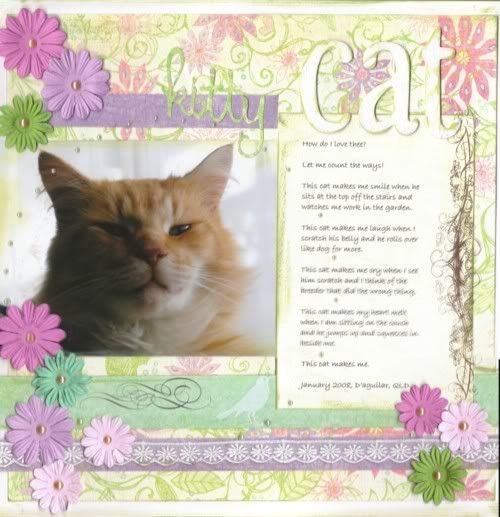
KITTY CAT - created by Julie
Julie has used lots of coloured patterned paper to disguise the white background of her layout.
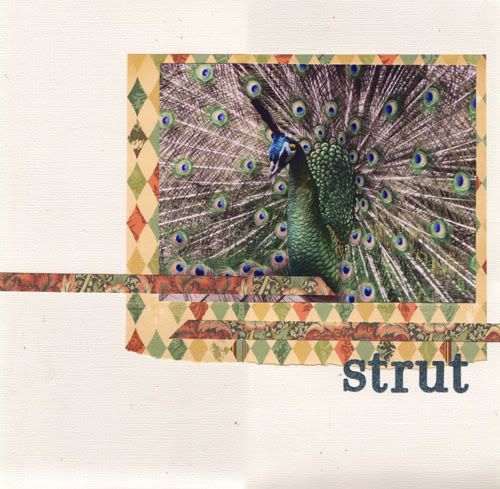
STRUT - created by Leonie
The minimalistic design of Leonie's layout allows the focus to stay on the fantastic photo of the peacock.
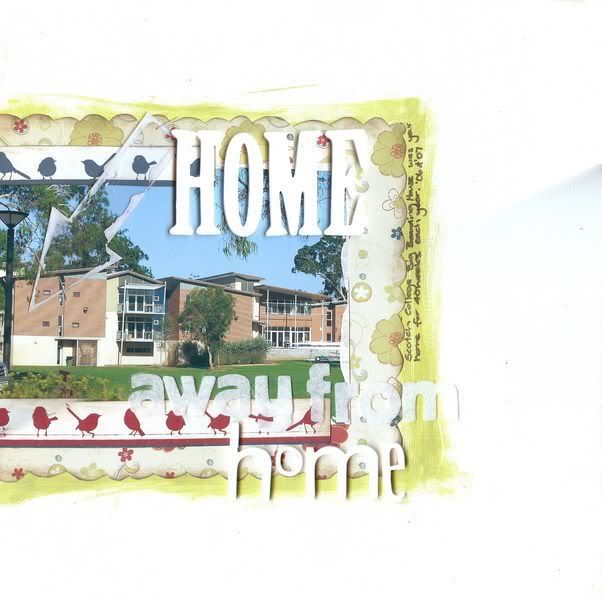
HOME AWAY FROM HOME - created by Michelle
Michelle has used paint to create the border for her photo, this brings the focus in toward the photo, and ignores all the white space on the layout.
|
|
Just Because....
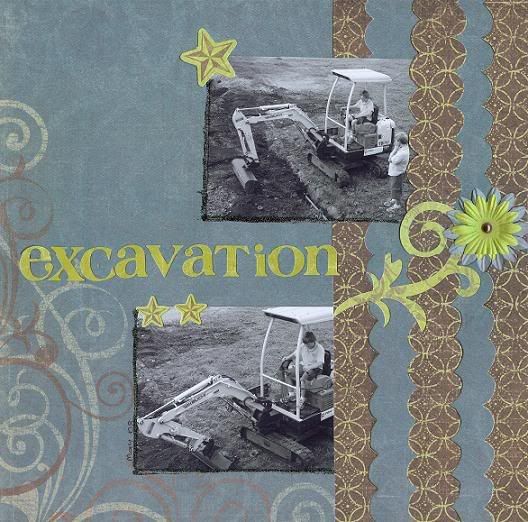
EXCAVATION - created by Deb
Deb has used Crate Paper's Static Range.
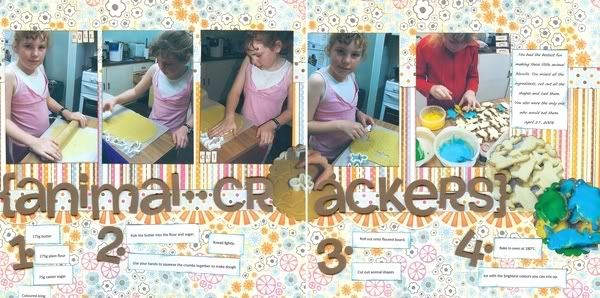
ANIMAL CRACKERS - created by Michelle
Michelle has used Sassafrass Lass Papers and Thickers Foam Alphabets
|
|
How - to - create...
Stab Binding Technique
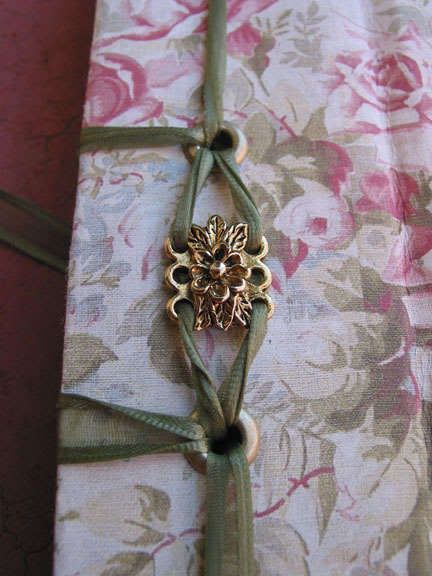
This is an easy and elegant way to bind your minibooks, albums and paperbag albums.
My modified method below is designed for three hole binding but can be adapted for more holes once you understand the concept.
Once you have cut your books pages and punched their holes, make sure the holes all line up and do the same with your book covers. Assemble you book , pages and all. If using this technique on a paper bag album, try folding a strip of adhesive backed cardstock over the bags spine and punch the holes through all layers.
Select your ribbon for binding. Wrap it a full four times around the assembled book spine, from the bottom back around to the bottom just to ensure you have enough ribbon to bind your book correctly.
Before you start binding use a bulldog clamp or similar on the sides of the book to keep the pages and cover from slipping around and to keep the holes correctly aligned.
Thread your ribbon on a needle leaving a short tail.
*Note: during the binding process try and keep your ribbon flat along the books surface for a nice clean look, take your time and straighten the ribbon between each stitch as you go along.
1-Starting at the back of the book, thread your ribbon up through the center hole, around the spine and back up through the center hole again, making sure to leave enough of a tail on the back of the book, approximately 20cms, to tie your bow at the end of the binding process, better to leave too much than not enough!
2-Next move your ribbon down through the top hole, around the spine, back down through the top hole and then up over the top edge of the book, back down through the top hole then back up the center hole.
3-Now move your ribbon down through the bottom hole, around the spine, back down through the bottom hole, up over the bottom edge of the book, back down through the bottom hole and back up through the center hole.
4-You have now finished binding the book, simply tie a bow as desired, either along the edge of the spine or you can tie it so the bow sits more on the front of the book.
|
 | |
|
|
|
|