| Happy Independence Day |  | |
|
| Last Week's Deal Redux | | |
Last week's Deal of the week generated some comments. If you recall, it was about the correct way to play:
Q x x
opposite
A J x x x
Ron Schoenau commented, "Rich, you forgot to mention the defense's 'mandatory' false card of the diamond nine or ten."
Baxter Clifford was a little more analytical:
The presence of the ♦8 in declarer's hand makes this a more complicated issue than you suggested.
Winning the lead in dummy, observe RHO's card.
If it is the ♦2, then assume the opening leader started with a 4-card suit, so lead a low diamond towards the ♦J. It would only be right to lead the ♦Q when LHO started with a stiff ♦10 or ♦9, and it is much more likely that LHO is 4432 than 4441 (and he might have led another 4-card suit if so). Now LHO has a chance to muddy the waters by making the standard expert play of ♦10 or ♦9, giving declarer the possibility that he started with a doubleton ♦10 9 and a subsequent lead of the ♦Q will pin that card. Against expert defenders (especially if LHO thinks before playing), just play the ♦A (and don't give them a chance to smile annoyingly); against weaker opponents, the lead of the ♦Q on the second round is probably best.
If RHO withholds the ♦2 (and he might as well, as no switch is likely to improve the situation) then leading the ♦Q becomes more attractive. Still, leading low seems best. Now if LHO drops the ♦10 or ♦9, leading the ♦Q on the next round seems best, as 5422 or 5332 shapes are now more likely.
|
| Free Bridge Lessons |  |
Rich answers your questions every Tuesday at 11:15.
On Thursdays, Bridge Ace features a vugraph presentation where Rich goes over any interesting hands from that week. The board is projected on our large projection screen for all to see as we're discussing it. |
|
|
 | Tricks from "Nowhere" |
You are vulnerable against nonvulnerable opponents and East opens 2♠, which is passed out.
| Contract: 2♠ |
|
|
Dummy
 7 7
 Q 8 5 4 2 Q 8 5 4 2
 K 10 9 2 K 10 9 2
 K 10 9 K 10 9 |
|
|
You
 Q 9 8 5 3 Q 9 8 5 3
 9 9
 A Q 6 3 A Q 6 3
 Q 6 4 Q 6 4 |
|
|
Sitting South against East's 2♠ contract, you lead your singleton heart. The play proceeds:
- Partner wins the ♥K (Declarer plays the ♥6)
- Partner wins the ♥A (Declarer plays the ♥J)
- Partner returns the ♥3 which you ruff (Declarer plays the ♥7)
- Your club switch is won by partner's ♣A (Declarer plays the ♣J)
- Partner returns the ♥10. East ruffs with the ♠J and you over-ruff with the ♠Q.
- You cash the ♦A.
- Declarer claims the rest.
You took the first six tricks for down one. Pretty good, right?
Well, not exactly. To see why, scroll down. |
 | Gourmet Lunch Resumes this Saturday | |
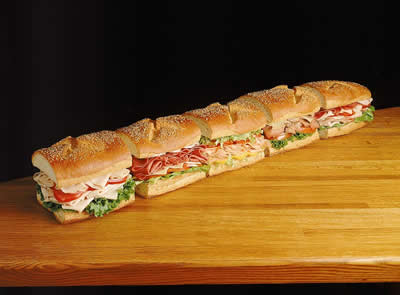
Billy will serve a five foot long New York Italian Deli style hero next Saturday.

The Saturday games have really picked up since we started the gourmet lunches.
We run a Barometer game that day as well. You should give it a try! |
 | The Answer |
You can promote another trump trick by refusing to over-ruff the ♠J.
When partner leads the ♥10 and declarer ruffs with the ♠J the position looks like this:
|
|
|
|
|