|
Best Practices
Metron tools that enhance your images
While it is a testament to the brilliance of Metron that you get great images without any tweaking, it is the "tweaking" tools that will help you enhance those images that may be missing the detail you are looking for.
Under-exposed images can be corrected!
To fix an under-exposed image, you can use one of two Metron tools - Window Leveling & Look-Up-Table (LUT).

Though Window Leveling is an easier tool to work with, the LUT can produce a better result. Experiment with these tools, get to know how they affect your images. To increase exposure using the LUT curve, find the center dot of the 3 presented dots on the diagonal line. Click and drag the center dot toward the lower right corner about ¼ distance. Watch your image for exposure improvement and adjust as needed.
The LUT can also help with over-exposed images - test out on some of your existing images to see just how well the LUT can help you.
Window Level for more detail.
 With the latest versions of Metron, you can now Window Level right on the image from both the main image screen and in "Full Screen" (FS) mode. Just click and hold down your left mouse button and then move the mouse over the image in any direction. With the latest versions of Metron, you can now Window Level right on the image from both the main image screen and in "Full Screen" (FS) mode. Just click and hold down your left mouse button and then move the mouse over the image in any direction.

Within a minute you will see how the image changes as you move the mouse. As with any of these tools, you can always click the "Undo" button or just re-click on the filter button to return to the original image view.
Want more bone detail?
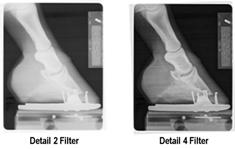
 Most of you are likely scanning images with the default filter set to either #1 or #2. To get more detail (Contrast) try filter #4. Most do not use the look of the filter #4 for general purpose but it is great when you want to exaggerate bone detail. Most of you are likely scanning images with the default filter set to either #1 or #2. To get more detail (Contrast) try filter #4. Most do not use the look of the filter #4 for general purpose but it is great when you want to exaggerate bone detail.
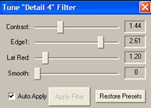
If that is not enough, click on the "Tune" button and add Contrast and Edge1 and then reduce "Smooth.


For more details, see the Advanced Image Processing online training session.
|